Jonny Langefeld
Software Engineer

All views expressed are my own and not affiliated with current or former employers.
Python Flask Base Project
This blog post describes my favorite setup of a project skeleton for a Python Flask web app or api. Keep on reading if you are interested in best practices for a Python Flask folder structure, architecture setup and testing. The repository with all files can be found here. It’s helpful for this blog post to download the repository. I’ll explain all necessary files and the folder structure.
Docker First
Like many of my projects, I like to dockerize everything. This also leads me to the only prerequisite: have Docker installed (I made a video how to install it). I like that everything is included with Docker and I can virtually run it on any cloud platform (because all of them offer container hosting services / webapps). Apart from that, I’ve often had the case, that one Python package doesn’t like the other. So if you happen to develop multiple projects on your computer ever, then it’s very likely that you run into similar issues. Docker takes care of it and separates each project from one another. It’s like a lightweight linux instance with only Python installed. I don’t like Python’s virtualenvs too much, because it copies all Python dependencies into my working directory.
The container is built on a lightweight linux container. So let’s start with the Dockerfile. In case you don’t know what that is, I also recommend watching the linked video above. The steps are as follows:
- Required packages from
requirements.txtare installed - All files required by the app are copied inside the container
- Tests are executed on container build
- The app will be executed with the entrypoint
python app.py:
FROM python:3.7-alpine3.7
COPY ./requirements.txt /requirements.txt
RUN pip3 install -r /requirements.txt
COPY ./app /app
WORKDIR /app
RUN pytest
CMD [ "python", "app.py" ]
The Dockerfile is necessary to build the container. But as you might have guessed, we still need the files the Dockerfile is referring to, so let’s look into the file structure before you start the build.
File Structure
Let’s start with the high level structure and we will go into more details after that:
├── Dockerfile
├── app
│   ├── app.py
├── deploy.sh
├── readme.md
└── requirements.txt
So there’s the Dockerfile we already talked about, there’s an app/ directory that contains all files the Python app needs, there is a deploy.sh script, which contains a skeleton for a bash deployment script to any cloud provider (this file can be ignored if not needed), there’s a readme as in any good repo and there’s the requirements.txt that was mentioned in the Dockerfile. The Dockerfile copies the app/ directory and the requirements.txt file inside the container and installs all packages defined in the requirements.txt file.
The requirements.txt File
The file structure of this is super easy. There’s basically one row for each package and two equals character and then the version. You can lookup the latest version here. I put the necessary packages to get started in there, but you probably want to add the packages you need.
Flask==1.0.2
requests==2.19.1
pytest==3.8.0
Now that we got that packages covered, that get installed on Docker build, only the app/ directory is missing.
The app/ Directory
Actually in the simplified folder structure above, I left most of the contents of the app/ directory out to confuse less in the beginning. Bet now that we unwrapped the different parts of the repo, let’s look at it’s contents:
├── app
│   ├── app.py
│   ├── templates
│   │   └── index.html
│   ├── static
│   │   ├── css
│   │   │   ├── bootstrap.min.css
│   │   │   └── custom.css
│   │   ├── img
│   │   └── js
│   │       ├── bootstrap.min.js
│   │       ├── custom.js
│   │       └── jquery-3.3.1.min.js
│   ├── pytest.ini
│   └── testing
│       ├── integration_test.py
│       └── unit_test.py
- The
app.pyfile is where all the magic happens and I will go deeper into it in a minute. - The
/templatesdirectory will contain html template files for all main screens within your app. Think of it as the layout, and the logic of your app fills it later with contents. The template language is called Jinja2. It has cool features like loops, variables and if statements right inside of the template. (The instagram website uses this Template language, isn’t that cool?) - The
/staticfolder contains all not variable web elements like css scripts, javascripts or images. I’ve pre-loaded this base repository with bootstrap and jquery as well as custom css and javascripts, but you can delete what you don’t want. Not the unique way of including those file into your html site though. If you open theindex.htmlfile, where we include bootstrap and jquery, you’ll find something like<link rel="stylesheet" href="{ { url_for('static', filename='css/bootstrap.min.css') }}" />in the header. This already calls a Jinja function to generate the url that directs to the static folder and then the sub folder/cssand then tobootstrap.min.css. - The
pytest.inifile contains some preferences for testing - The
/testingdirectory contains the actual scripts for unit tests and integration tests. With unit tests I test the single functions defined in theapp.pyscript and their outputs, and with integration tests, I spin up an entire Flask test client, that can query itself for API calls.
Now that we covered the entire file structure, the last part missing is to look into the Python files:
The app.py File
The overall structure of the file is as follows (described in meta code):
import core packages

import third party packages

# define needed classes and functions functions
def classes_and_functions

app = Flask(__name__) # define the Flask app

# definition of the endpoints
@app.route('/', methods=['GET'])
def index():
    """Return the index.html page"""
    return render_template('index.html')

# start the app
if __name__ == '__main__':
    app.run(host='0.0.0.0', port=80, debug=True)
I think the meta code including the comments is pretty self explanatory. Eventually I will add an /utils directory that allows importing own classes and functions.
The integration_test.py and unit_test.py files
The pytest.ini file defines that it will look in the /app directory inside the Docker container for a directory called /testing. Inside this directory it will run all Python files that begin with test_ or end with _test. Hence our two files in the directory will be executed. Both have the same imports:
import pytest
import sys
sys.path.append('/app')
from app import app
The last two lines of the code block above make sure that the testing file always looks in the /app directory in the root of the Docker container. Inside there, it will look for the app.py file (because of the from app keyword) and for the app variable inside that file (because of the import app keyword).
pytest will just run through all function that start with test_ in their name. I’ve added a few examples to those files, so it’s the easiest to check them out in the repo.
For the test_integration.py file, after the import block, there is a pytest fixture defined. Mainly it spins up the Flask test client once and keeps it alive during the entire run of the integration test. This is necessary for when you have logins to your app and certain requests to your endpoints only work if a user is logged in. So one of your first tests would then be to login a sample user.

Project Setup in PyCharm
I like the testing and debug features of PyCharm, so I included the .idea/ directory into the repo. In there are definitions like to execute the tests inside the Docker container. Or when you click the debug button, it will spin up the container including the debugger so your brake points will work inside the containers. So when you open this repo with PyCharm, this would already be implemented.
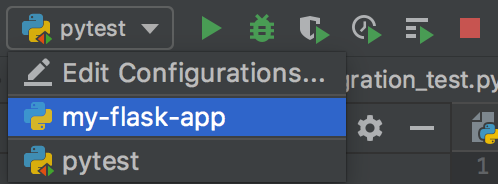
Look out for the run configurations within PyCharm. The my-flask-app configuration is to run and debug the actual app (inside the container) and the pytest configuration runs and debugs the tests (inside the container). I configured the run configurations so they would mount the app/ directory inside the container. That means you don’t need to rebuild the container for every run (only once in the beginning).
Next Steps
I have a few more ideas that I want to include in upcoming updates:
- a
utils/directory that excludes all classes and functions, which then can be imported in theapp.pyfile - a sample database connection with an ORM (object-role modeling) implementation
Tags: python, programming, software development, repo